Drawing foxes can be a fun and rewarding artistic endeavor. Whether you’re a beginner or an experienced artist, learning how to draw these fascinating creatures can help improve your skills and expand your artistic repertoire. In this article, we will guide you through the process of drawing foxes step by step, providing valuable tips and techniques along the way.
To start, we will provide an introduction to drawing foxes and discuss the materials you’ll need for this artistic endeavor. Understanding the essential drawing tools and selecting the right paper are crucial for achieving the desired results.
Next, we will delve into the anatomy of a fox, exploring the key features and proportions that make up their unique appearance. This understanding will lay the foundation for a more accurate and realistic representation of foxes in your drawings.
The step-by-step guide will take you through the process of drawing a fox, breaking it down into manageable stages. We will begin with sketching the basic shapes and gradually add details to create a lifelike portrayal of a fox’s face, body, and tail. Adding texture and fur will bring depth and dimension to your artwork.
Drawing realistic foxes requires attention to detail and technique. We will provide tips on capturing the expressions of these animals and creating depth through shading. These techniques will enhance the realism of your drawings and bring them to life.
Finally, we will explore different styles and poses for drawing foxes. Cartoon-style foxes can be a playful and whimsical addition to your artwork, while realistic-style foxes will showcase your ability to depict the animal’s natural beauty and characteristics.
Whether you’re looking to refine your artistic skills or simply want to try your hand at drawing foxes, this article will provide you with the guidance and inspiration you need to create stunning fox illustrations. Let’s dive in and unlock the world of fox drawing!
<table>
Contents
- 1 Materials Needed for Drawing Foxes
- 2 Understanding the Anatomy of a Fox
- 3 Step-by-Step Guide: How to Draw a Fox
- 4 Tips for Drawing Realistic Foxes
- 5 Exploring Different Styles and Poses for Drawing Foxes
- 6 Frequently Asked Questions
- 6.1 Question 1: How can I draw foxes?
- 6.2 Question 2: Are there any guidelines for drawing foxes on YouTube?
- 6.3 Question 3: Can I test new features related to drawing on YouTube?
- 6.4 Question 4: How does YouTube work for creators interested in drawing content?
- 6.5 Question 5: How can I terminate a contract related to drawing content on YouTube?
- 6.6 Question 6: What is the copyright status for drawing content on YouTube?
Materials Needed for Drawing Foxes
When drawing foxes, you will need several Materials Needed for Drawing Foxes for a successful artwork. Here is a list of
– Start with Materials Needed for Drawing Foxes in various hardness levels (HB, 2B, 4B, 6B) for shading and outlining the fox.
– Choose sturdy drawing paper or sketchbook that can handle Materials Needed for Drawing Foxes and erasures without smudging or tearing.
– Have a kneaded eraser for lighter corrections and a vinyl eraser for more precise erasing.
– Use blending stumps or tortillons for smooth transitions and textures in your red fox drawing.
– Fine liner pens in various thicknesses can be used for adding details and defining the fox’s features.
– If you want to add color, have colored pencils or watercolor paints ready.
– Gather high-quality reference images of foxes that showcase different poses and angles for accurate representation.
Now that you have all the Materials Needed for Drawing Foxes, you can start your fox drawing! Practice sketching the basic shapes, observe the fox’s anatomy, and gradually add details and shading to bring your artwork to life. Take your time, enjoy the process, and experiment with different techniques to create a captivating fox drawing.
What Are the Essential Drawing Tools?
Having the right tools is essential for successful and detailed fox drawings. So, what are the essential drawing tools? Here are the key tools that you will need:
– High-quality graphite pencils (ranging from hard to soft) for achieving different tones and textures.
– Kneaded eraser and vinyl eraser for corrections and highlights.
– Tortillions or blending stumps for smudging and blending graphite, creating smoother shading transitions.
– Acid-free sketchbook or drawing paper for a smooth surface.
– Reference photos or images of foxes for accurate details of anatomy and features.
– Sharpener with different sizes for precise lines and details.
By using these essential drawing tools, you will be able to start drawing foxes. Remember, practice and experimentation will enhance your skills and bring your fox drawings to life.
Which Paper is Best for Drawing Foxes?
When it comes to drawing foxes, it is important to choose the right paper. The type of paper you use can have a significant impact on the texture, color vibrancy, and overall finish of your artwork. To help you make the best choice, consider the following options:
- Drawing Paper: This versatile paper is perfect for various drawing techniques. Look for medium-weight paper with a smooth surface, as it allows for precise details and blending.
- Bristol Board: Known for its smooth and slightly grainy surface, Bristol board is an excellent choice for detailed and refined drawings. Opt for a heavier weight to ensure durability.
- Watercolor Paper: If you plan to incorporate watercolor or ink washes into your fox drawing, using watercolor paper is advisable. It can withstand wet media without warping or buckling.
- Mixed Media Paper: If you enjoy experimenting with different mediums, consider using mixed media paper. It can accommodate markers, colored pencils, and acrylic paints.
- Toned Paper: Adding depth and dimension to your fox drawings can be achieved by using light tan or gray toned paper. This type of paper works well for both dark and light-colored foxes.
Remember that the choice of paper ultimately depends on personal preference and the effect you want to achieve. It is recommended to try out different papers to find the one that best suits your style and artistic vision.
Understanding the Anatomy of a Fox
Understanding the anatomy of a fox is crucial if you want to accurately depict this captivating creature. By familiarizing yourself with the various parts that make up a fox’s body, you can truly capture its essence in your artwork. Let’s explore the key anatomical features of a fox, shall we?
1. Head: The head of a fox is triangular in shape, featuring a pointed snout and ears that stand upright.
2. Eyes: The eyes of a fox are almond-shaped and typically have a golden or amber hue.
3. Body: Foxes have slender bodies with a flexible spine, which allows them to move with great agility.
4. Fur: A fox’s fur is thick and serves as insulation, allowing them to adapt to different climates. The color of their fur can range from red to gray or silver.
5. Legs: Foxes have long and slender legs, enabling them to run swiftly and effortlessly navigate over obstacles.
6. Tail: The tail of a fox is long and bushy, often referred to as a brush. Not only does it aid in communication, but it also helps the fox maintain its balance.
Pro-tip: When drawing a fox, pay attention to the proportions of its body. The elongated snout, large ears, and fluffy tail are distinct features that make foxes truly unique. Incorporating these details into your drawing will breathe life into your artwork!
Step-by-Step Guide: How to Draw a Fox
Learn how to bring foxes to life on paper with this step-by-step guide. From sketching the basic shapes to adding intricate details and textures, we’ll take you through each stage of the drawing process. With helpful tips and techniques, you’ll gain the skills needed to create captivating fox illustrations. Ready to dive in and unleash your creativity? Let’s embark on this artistic journey together in capturing the essence of these magnificent creatures.
Step 1: Sketching the Basic Shapes
To sketch a fox, start by sketching the head and body using light pencil outlines of oval shapes. Next, add the smaller details of the fox’s face. Draw two circles for the eyes, a small triangle for the nose, and a curved line for the mouth. Then, create the body and tail using curved lines. Make sure to include a long, fluffy tail that curves back towards the body. To add fur and texture, draw short, curved lines that follow the contours of the fox’s shape. By following these steps, you will be able to sketch the basic shapes of a fox. Don’t forget to use light and confident strokes. If needed, refer to images or real-life foxes for accuracy.
Step 2: Adding Details to the Face
When adding details to the face of a fox, follow these steps:
Step 1: Start with the eyes: Draw two almond-shaped eyes, slanted towards the center of the face. Add a small circle inside each eye for the pupils.
Step 2: Add the ears: Draw two triangular-shaped ears on the top of the head, tilted outward. Pay attention to the size and placement of the ears, as they vary between different fox species.
Step 3: Draw the muzzle: Sketch a small triangle-shaped muzzle, starting from the bottom of the eyes and extending downward. Leave a small gap between the muzzle and the rest of the face.
Step 4: Define the nose: Draw a small oval-shaped nose at the tip of the muzzle. This will be the center point for the fox’s facial features.
Step 5: Outline the face: Use gentle curves to create the shape of the fox’s face, starting from the top of the head and following the curve of the muzzle down to the chin. Pay attention to the specific shape of the muzzle, as it can vary depending on the fox species.
Step 6: Add the mouth and whiskers: Draw a curved line under the nose to represent the mouth. Add two short lines on each side of the muzzle for the whiskers. These lines should start from the base of the muzzle and extend outward.
Step 7: Detail the eyes: Add more definition to the eyes by including eyelashes along the upper eyelid and small curved lines around the eyes for fur.
Following these steps will help you add realistic details to the face of your fox drawing.
Step 3: Drawing the Body and Tail
To draw the body and tail of a fox, follow these 3 steps:
- Begin by sketching basic shapes for the body and tail using circles and ovals.
- Add details to the body, such as the neck, legs, and ears, paying careful attention to proportions and positioning.
- Direct your focus on the tail, which should be long and bushy, tapering to a point. Use quick, flowing lines to capture the texture and shape of the tail.
- To refine the body and tail, add fur and texture. Utilize short, overlapping strokes to create the illusion of fur. Additionally, refer to images and real-life foxes for guidance.
- Bring the fox to life by adding facial features, markings, or shading. Pay attention to the small details that make each fox unique, such as the placement of its eyes or whiskers.
Drawing the body and tail of a fox requires careful observation and attention to detail. Practice and experiment with different techniques to develop your own style and capture the essence of these beautiful creatures.
Step 4: Adding Fur and Texture
Adding fur and texture is an essential step in bringing your fox drawing to life. Here is a step-by-step guide to assist you in achieving realistic fur and texture:
1. Observe reference images of foxes to understand the direction and pattern of their fur.
2. Use a sharp pencil or a fine-tipped pen to lightly sketch the basic outline of the fur. Start with short, directional strokes to mimic the flow of fur.
3. Gradually build up the fur by adding more strokes, focusing on areas where the fur appears thicker or longer. Vary the pressure to create depth and dimension.
4. To create shades and highlights for a realistic look, utilize different pencil grades. Darken shadowed areas and apply lighter strokes for areas with light.
5. For adding texture, lightly flick your pencil or pen to create small, random strokes throughout the fur. This technique will mimic the look of individual hair strands.
6. Keep adding layers of fur and texture until you are satisfied with the overall look. Take breaks and step back to assess your progress.
7. For a smoother appearance, blend and smudge the strokes with a blending stump or your finger.
True story: I once faced challenges in adding realistic fur and texture to my fox drawing. However, by following these steps and practicing diligently, I eventually achieved a stunning result. The realistic fur and texture brought the fox to life on the paper, and I felt proud of my accomplishment. So, if it seems challenging at first, don’t get discouraged. With practice and attention to detail, you too can master the art of adding fur and texture to your fox drawings.
Tips for Drawing Realistic Foxes
Capturing the essence of foxes in your drawings can be a fascinating endeavor. In this section, we’ll uncover valuable tips and techniques that will elevate your fox drawings to a whole new level of realism. From mastering the art of capturing their expressions to adding depth and dimension with shading, get ready to discover how to bring these cunning creatures to life on paper. So grab your pencils and let’s embark on a drawing journey that celebrates the beauty of foxes.
How to Capture the Expressions of a Fox
When wanting to capture the expressions of a fox in your drawings, it’s essential to pay attention to the details of their facial features and body language. Here’s a guide on how to effectively capture the expressions of a fox in your drawings.
By following these steps, you can effectively capture the expressions of a fox in your drawings and bring them to life.
Creating Depth and Dimension with Shading
Creating depth and dimension with shading is crucial for achieving realistic and three-dimensional fox drawings. Here are some helpful tips to incorporate shading techniques and enhance your artwork:
- Begin with light shading: Start by lightly shading the areas that are in shadow, gradually increasing the darkness as needed.
- Consider light sources: Take note of the direction of the light source and darken the opposite side of the fox’s body to accurately depict lighting and shadows.
- Explore different shading techniques: Experiment with various techniques such as hatching, cross-hatching, and stippling to add texture and depth to your drawing.
- Adjust your pencil pressure: Vary the pressure you apply to your pencil to create different values and tones. Apply more pressure for darker areas and less pressure for lighter areas.
- Blend and smudge: Use a blending stump or your finger to blend and smudge the shading, creating smooth transitions between light and dark areas.
- Gradually build up layers: Start with lighter shading and gradually add layers of darker shading to create depth and volume in your drawing.
By practicing these shading techniques, you can bring your fox drawings to life and effectively convey a sense of depth and dimension. Don’t hesitate to experiment and discover your preferred shading style.
Exploring Different Styles and Poses for Drawing Foxes
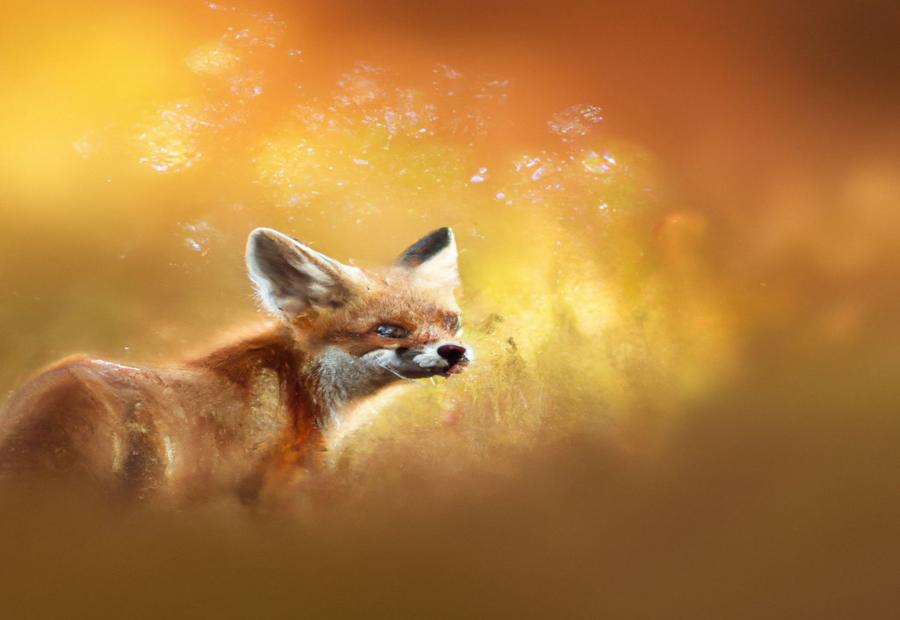
Photo Credits: Foxauthority.Com by Robert Moore
Take a walk on the wild side as we dive into the world of drawing foxes! In this section, we’ll be exploring different styles and poses that will bring these cunning creatures to life on your canvas. Get ready to unleash your artistic prowess as we dive into the captivating realm of drawing foxes. From playful and whimsical cartoon-style foxes to intricate and lifelike depictions, we’ll explore the diverse range of possibilities to help you master this elusive subject. So grab your pencils and let’s embark on this creative adventure!
Cartoon Style Foxes
When creating drawings of cartoon style foxes, it is important to keep in mind several key points. First, use simplified shapes such as a rounded head, triangular ears, and a long oval for the body. This will help create a distinct and recognizable fox character. Additionally, exaggerate certain features to give the fox a cute and playful appearance. For example, make the eyes larger and the snout smaller. Don’t be afraid to play around with proportions and facial expressions to add personality to the character.
In terms of drawing technique, it is recommended to use curved lines. These lines can be used to create smooth, flowing shapes for the body, tail, and facial features. This will convey a sense of movement and playfulness in the artwork.
When it comes to color, opt for bold and vibrant oranges and reds for the fur. This will make the character visually appealing and help it stand out. Additionally, consider adding fun patterns or textures to further enhance the appearance of the fox.
Lastly, don’t be afraid to experiment with different poses for the fox. Drawing the character in dynamic poses such as jumping, running, or sitting playfully can add energy and personality to the artwork.
On a related note, it is interesting to know that the popular cartoon character “The Fox” from the song “The Fox (What Does the Fox Say?)” was created by the Norwegian comedy duo B rd Ylvis ker and Vegard Ylvis ker. This song became a worldwide sensation and highlighted the enduring popularity of cartoon foxes.
Realistic Style Foxes
To draw realistic style foxes, pay attention to their details and characteristics. Consider the following aspects:
– Anatomy: Understand the proportions and structure of a fox’s body, including the shape of the head, ears, and the length and shape of the tail.
– Fur Texture: Notice the texture and patterns of a fox’s fur. Use short, fine lines to create realistic fur texture, especially around the face, chest, and tail.
– Eyes and Facial Expressions: Focus on capturing the soulful eyes and unique expressions of a fox. Emphasize the shape, color, and details of the eyes and muzzle.
– Coloring: Choose appropriate colors and shading techniques to accurately depict the fur colors of different fox species. Use a combination of light and dark shades to add depth and realism.
– Light and Shadow: Use shading techniques to create depth and dimension in your drawing. Understand how light falls on the fox’s body and where shadows are cast.
By paying attention to these aspects, you can create stunning and realistic drawings of foxes that capture their unique beauty. Remember to practice and observe real foxes or reference photographs to enhance your skills. Enjoy exploring the realistic style of drawing foxes!
Fun Fact: Foxes are known for their intelligence and adaptability, allowing them to thrive in various environments around the world.
Frequently Asked Questions
Question 1: How can I draw foxes?
Answer: To draw foxes, you can start by sketching the basic shape of their body using simple geometric shapes like circles and ovals. Then, add details like the head, ears, eyes, and muzzle. Pay attention to their unique features, such as their bushy tail and pointed ears. Use reference images or tutorials for guidance, and practice to improve your drawing skills.
Question 2: Are there any guidelines for drawing foxes on YouTube?
Answer: Yes, YouTube has guidelines for drawing foxes or any other subject matter. These guidelines ensure a safe and positive environment for creators and viewers. When creating art videos or tutorials involving foxes, make sure to follow YouTube’s content policies, which prohibit explicit or harmful material. Additionally, consider adding appropriate tags and descriptions to make your content discoverable by interested viewers.
Answer: Yes, YouTube provides the option to test new features, which may include tools or functionalities related to drawing or art creation. As a user, you can participate in these testing phases and provide feedback to YouTube. Keep an eye out for any announcements or notifications from YouTube regarding beta testing or experimental features.
Question 4: How does YouTube work for creators interested in drawing content?
Answer: YouTube is a platform where creators can share their drawing content with a wide audience. As a creator, you can upload your artwork, tutorials, or time-lapse videos of your drawing process. Optimize your video titles, descriptions, and tags with relevant keywords to reach a desired audience. Engage with your viewers through comments and community features, and consider joining the YouTube Creator Program for additional benefits and support.
Answer: If you have any contracts or agreements related to your drawing content on YouTube, you can terminate them through the platform. YouTube provides a process to manage contracts, which might involve contacting the relevant parties or following specific guidelines. Refer to YouTube’s contract termination procedures or seek legal advice if needed.
Question 6: What is the copyright status for drawing content on YouTube?
Answer: All drawing content uploaded on YouTube is subject to copyright laws. As mentioned in the provided reference data, the copyright for YouTube content is owned by Google LLC until 2023. This means that individuals or entities cannot reproduce, distribute, or use your original drawing content without proper permission. It’s important to understand copyright laws and consider adding copyright notices or watermarking your drawings to protect your intellectual property.